Thursday 25 April 2024

A Colour Challenge for the Ink & Inspiration Blog Hop - April 2024

Hello and welcome to my blog. Today I am delighted to be taking part in the Ink and Inspiration blog hop for April 2024.


T
his month the challenge is to create a card using the colour selection or the atmospheric photo as our inspiration.


The bird looks so beautiful in the photo we are using to guide us and
so I decided to use the Thoughtful Expressions set to create with. The stamped image is quite a close representation and the image just as tranquil. 

The starting point for my card was therefore the bird image. I stamped using Versamark ink and heat embossed using gold powder on to Fluid 100 Watercolor paper. I am by no means a watercolour painter, but I gave it my best shot and the embossed lines retained the colour well. I use an acrylic block as a palette and press it onto an ink pad to transfer the ink. I find this easy to clear up, and there is no mess in the well of my ink pad!


Using my narrow Water Painter I mixed some Shy Shamrock and Pretty Peacock to colour the wings making the tips slightly darker by adding more Pretty Peacock. The body is mostly Daffodil Delight and the head is Starry Sky. The tail feathers are a lovely rusty colour which was achieved by blending Berry Burst and Daffodil Delight inks (mixing red and yellow makes orange!).
By remembering my colour theory, I managed to use all the colours except for Petunia Pop. After die cutting the image I added a sheen using the Wink of Stella Glitter Brush. I cleaned the tip between colours so that I didn't blend them into a muddy mess. The Wink of Stella is twinkling beautifully under my lights, but alas the photo doesn't capture the sparkle at all well.

I stamped a floral image onto a Pretty Peacock layer using matching ink for a tone on tone effect and then die cut the circle out. The little bird is mounted with Dimensionals onto a Shy Shamrock circle. A Basic Beige card base is topped with Shy Shamrock and Pretty Peacock layers  together with a sentiment stamped using Pretty Peacock ink. Basic Beige works really well with the watercolour paper!


The card is finished with a few splatters of Wink of Stella to add shine and a trio of Pretty Peacock Foiled Gems. This card doesn't resemble the idea I had in my head in the slightest. However, I am pleased with the end result and I hope that you are inspired by my creation. Please continue along the hop to see what the others have created too - click on the names below to enjoy their  projects. We would love to hear from you and so if you have been inspired, please leave a comment.

Blog Hop Index

Do you need any of the products  used on today's cards? If you live in the UK please take a look in my online Stampin' Up! shop. You can follow the link or click on the pictures below of the products I have used today.

Stay safe and as always, happy crafting,


If you would like to order any supplies, and you live in the UK, I would love to be your demonstrator.
Use the current hostess code (April 2024 code: 9WCSE4QX) to get some free product (it will follow in the post after the end of the month). If your order is over £150 do not use the code as you become the hostess and get the rewards. To place an order please visit my online shop HERE

If you would like to join my team, you can choose your starter kit HERE and if you have any questions, please contact me at furrycatdesigns@gmail.com

Click on the images of the products I have used today to purchase them in my online shop:

Rembember to use the current hostess code.  

April 2024 code: 9WCSE4QX


Wednesday 17 April 2024

New at SU! April Blog Hop - Casing Angie's Treat Box


Hello and welcome to my blog. Today, I am participating in the New at SU! blog hop. We are a group of Stampin' Up! demonstrators from around the world who are full of creative papercrafting ideas to share with you to get you crafting. This month we are using current products to CASE another team member. It is my absolute pleasure to be casing Angie McKenzie of Nature's Inkspirations. 


Angie's project I've chosen to CASE is last month's New at SU! blog hop project which I absolutely love. It's a darling treat box created and filled with love. Angie created her treat boxes as an Easter gift for her parent's friends - I thought they would make fabulous table gifts for my next crafty class.


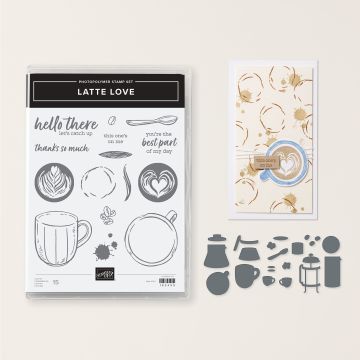
I've retained the general size of Angie's box, the wrapped layer and the ribbon. I have also included a bookmark, of sorts, and the crumpled filling although I have changed up the theme as my decoration utilises the Online Exclusive Latte Love products.


I constructed the box from a piece of cardstock measuring 23cm x 7cm -scoring at 1cm, 8cm, 12cm and 19cm creates the sides of the box. Each long side was scored at 1cm - one edge forms the folded border at the top and the other edge is snipped to create flaps to adhere the base piece to. After creating a tube from the scored card a rectangular piece of matching card, measuring 7cm x 4cm, can be adhered to the flaps to create the bottom of the box.


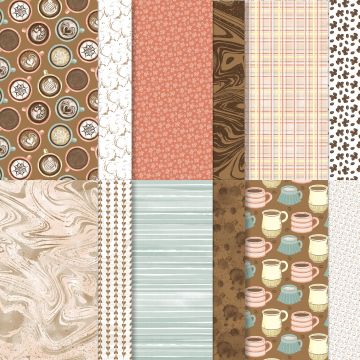
The box is wrapped with a narrow strip of the A Little Latte DSP, some Baker's Twine or Lost Lagoon Ribbon (retiring) and a couple of die cut cups. A triangle of Swirl Dots finish off the decoration.


I decided to use
my bookmark as a means of introducing the new InColors. I stamped the coffee drips, which make convincing ink splatters, in each of the new colours and added a matching die cut cup together with a Shimmer Gem. Initially, I wasn't sure about a couple of the new colours, but even after this quick stamping session I am now converted to them. At the moment my favourite is Summer Splash.


I intend to sit the filled boxes alongside the card kits at my next card gathering. Coffee and biscuits are always part of the occasion, but it is so much better when they are presented in pretty boxes! So, nestled amongst the thin strips of
crumpled card (Lost Lagoon or Pecan Pie) there will be some tasty nibbles, a tea or coffee bag together with the InColor bookmark.


I hope that you have been inspired by my project today. Continuing along the hop to the others will provide you with even more project ideas - you are currently with me, Furry Cat Designs by Karen Henderson - but before you hop on to see what Angie has made this month, please take a moment to leave a comment. We love reading your comments!

Blog Hop Index

Do you need any of the products I have used today? If you live in the UK please take a look in my online Stampin' Up! shop. You can follow the link or click on the pictures below of the products I have used today.

Stay safe and as always, happy crafting,


If you would like to order any supplies, and you live in the UK, I would love to be your demonstrator.
Use the current hostess code (April 2024 code: 9WCSE4QX) to get some free product (it will follow in the post after the end of the month). If your order is over £150 do not use the code as you become the hostess and get the rewards. To place an order please visit my online shop HERE

If you would like to join my team, you can choose your starter kit HERE and if you have any questions, please contact me at furrycatdesigns@gmail.com

Click on the images of the products I have used today to purchase them in my online shop:

Rembember to use the current hostess code.  

April 2024 code: 9WCSE4QX


Saturday 13 April 2024

Stamping Inkspirations Blog Hop - Fun Fold Time!


Hello and welcome to my blog! Today I am taking part in a blog hop with some fellow enthusiasts who love sharing their creative talents using their Stampin' Up!® products. This month the Stamping Inkspirations blog hop is all about Fun Folds.


I love making fun fold cards and for this blog hop we were encouraged to make a fun fold card that is new to us. I am looking forward to trying out some new recipies from the other participants.

Whilst it is true that new and unique cards can be made simply by revamping the stamps and papers used with old favourite folds, I'm always on the look out for a new favourite fold! I saw Connie Stewart demonstrate this one, and knew that I had to try it myself.  She called it a book fold explosion card and I can see many possibilities!


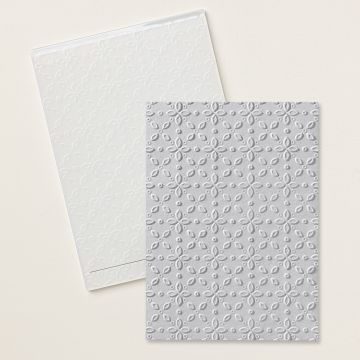
From the outside this looks just like any other book fold card, except it's a little more bulky! The front of the gorgeous Grape base card is divided such that the right hand side is a square and it's decorated with Painted Lavender Designer Series Paper on a matting layer of Pretty Peacock. The spine part has a layer of Pretty Peacock decorated with an embossed layer of Gorgeous Grape card. I used a new 3-d embossing folder from the new Annual Catalogue called Eyelet. I also used a strip of embossed card beneath the sentiment, using the dots as a sort of punctuation mark!

The Linen Thread coordinates perfectly with the background of the DSP, which is also adorned with some Purple Fine Shimmer Gems and a couple of extra stamped butterflies. 

Opening the cover reveals the first page of the book which I've decorated simply with a birthday message and a couple of stamped and die cut butterflies.


Turning the next page of the book unveils my favourite page! I used the second largest of the Perennial Postage dies to cut a square matting layer - the die is rectangular in shape, so you have to shorten it by doing two passes through the die cutting machine to create the square shape.


The embossed layer is made from the new Basic Beige card, which is a colour that I already love. It is decorated with a little lavender posy and some more of the 
Purple Fine Shimmer Gems. 


I think that this panel really deserves to be on the front of the card! 

Finally, the last page opens upwards - hence the explosion part of the name! Here there are a further two postage squares stamped with more butterflies and another birthday greeting. There is plenty of space to write a message. Both sentiments on the card are from a new set appearing in the new Annual Catalogue - it's called Simply Said. There are a mixture of fonts and sayings, which I know are going to be so useful.


The exploding piece of DSP is folded in to quarters and to allow it to fold up like a book one of the fold lines is cut from the outside edge to the centre (as shown by the white line). This side of the paper has an obvious direction so it is important to check that the orientation is correct before you stick it into the book and attach the layers! Perhaps, using a non-directional pattern would be easier next time.

I hope that you are inspired by my card today and that you will continue along the hop to see what the others have created too. Enjoy the projects. We would love to hear from you and so if you have been inspired, please leave a comment.


Aurélie FabreTricia Butts

Leonie Stuart  ●  Danielle Kassing   ●   Kim Fee

Marga Bultena  ●  Karen Henderson  ●  Rebecca-Jo Unwin

Mo Rootes  ●  Jan Musselman  ●  Judith Patterson


Do you need any of the products  used on today's cards? If you live in the UK please take a look in my online Stampin' Up! shop. You can follow the link or click on the pictures below of the products I have used today.

Stay safe and as always, happy crafting,


If you would like to order any supplies, and you live in the UK, I would love to be your demonstrator.
Use the current hostess code (April 2024 code: 9WCSE4QX) to get some free product (it will follow in the post after the end of the month). If your order is over £150 do not use the code as you become the hostess and get the rewards. To place an order please visit my online shop HERE

If you would like to join my team, you can choose your starter kit HERE and if you have any questions, please contact me at furrycatdesigns@gmail.com

Click on the images of the products I have used today to purchase them in my online shop:

Rembember to use the current hostess code.  

April 2024 code: 9WCSE4QX